Acoustiblok Installatie Voorschriften
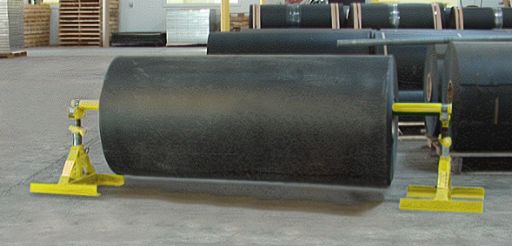
Commercial Master Roll on RD350 Roll Dispenser
Deze installatieomschrijving geeft weer hoe het acoustiblokmateriaal gemakkelijk is te Acoustiblok is een zwaar meteriaal, (70kg per rol van 12,5m2-3mm) Alle gereedschap (buiten reguliere gereedschappen) zijn beschikbaar op aanvraag in combinatie met een order van acoustiblokmaterialen, zie Installation Accessories List [PDF].
Handeling & Voorbereiding
Acoustiblok is een erg zwaar materiaal en moet geleverd worden rekening houdend met dit gewicht. Het gewicht van rollen kan varieren van 70kg tot 725 kgAcoustiblok kan blootgesteld worden aan allerlei verschillende soorten weersomstandigheden, maar als het verwerkt wordt moet het wel schoon en droog zijn, om het goed geluidsdicht af te kunnen sluiten. Wanneer het geleverd wordt is het gemakkelijk om zo dicht mogelijk bij de plaats waar het verwerkt moet worden te leveren.
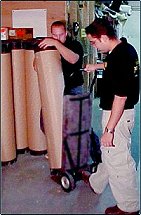
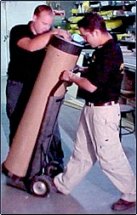
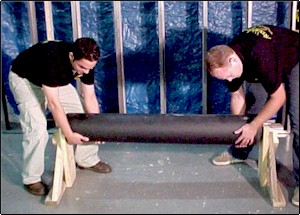
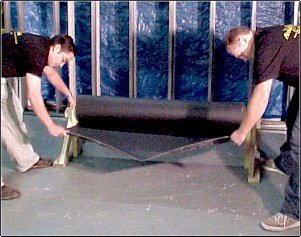
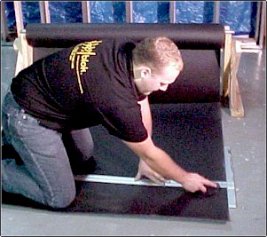
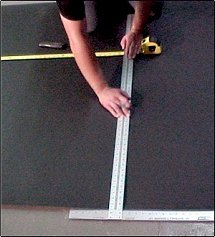
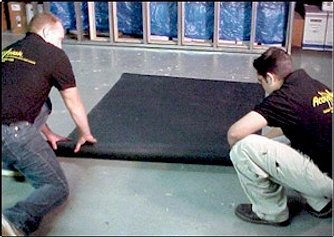
Om Acoustiblok voor te bereiden voor verwerking, plaats de rol in een Acoustiblok RD350 roll dispenser. Men kan ook zelf een frame maken zoals te zien is op [Fig 3], maar de veiligste manier is het gebruik van de RD 350 Roll dispenser.Rol eerst de eerste meter van de rol uit [Fig 4] en zorg dat het einde van de rol recht is door met een winkelhaak het restmateriaal eraf te snijden.[Fig 5] Use the square when cutting Acoustiblok to length for installation runs. [Fig 6] Dit geeft je een goed startpunt voor het het verwerken van het materiaal. Wanneer je een stuk afgesneden hebt, rol de het overgebleven stuk terug om te voorkomen dat het materiaal gaat krullen gedurende de installatie. [Fig 7].
Acoustiblok Installatie Overzicht
Voordat je begint moet je alle belangrijke punten die bedekt worden door het acoustiblok goed markeren, denk hierbij aan stopcontacten, waterpunten en andere belangrijke aansluitingen. Hierna kan je zemarkeren of uitsnijden uit het Acoustiblok. Doe dit bij elk stuk direct, want anders zal het zeer moeilijk zijn om deze punten terug te vinden.
Een Acoustiblokgeluidsbarierre moet een luchtdichte afsluiting hebben. Als lucht door kieren kan paseren, dan zal ook geluid via deze weg kunnen ontsnappen. Dit is dus een zeer belangrijke stap gedurende de installatie van het product, om de geluidsisolatie te waarborgen. Door het gebruik van Acoustitape en Acoust Sound Sealant, kunnen alle hoeken en kieren goed luchtdicht afgesloten worden.
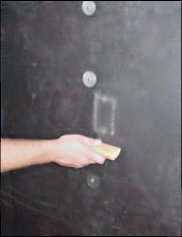
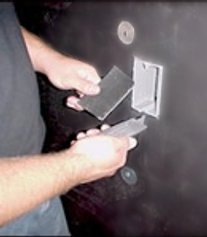
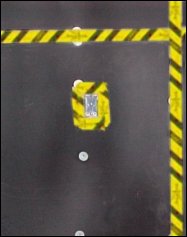
Zorg bij het verwerken van het materiaal dat het logo en de UL printing zichtbaar zijn zodat bij inspectie duidelijk zichtbaar is dat er Acoustiblok gebruikt is en geen materiaal wat qua uiterlijk op acoustiblok lijkt maar een mindere geluidsisolerende werking heeft. .
Wanner het mogelijk is moet men proberen om het Acoustiblok aan de kant te monteren waar de bron van het geluid zich bevindt. Dit zal het beste akoestische relutaat opleveren.
Acoustiblok is een zeer specifiek materiaal wat slecht hecht met andere materialen, waardoor normale tapes, kit of lijm zeer slecht, of zeer tijdelijk zal hechten aan de Acoustiblok. Als in eerste instantie het materiaal luchtdicht is afgesloten kan dit na een dag of 4 loslaten waardoor het resultaat ernstig beinvloed kan worden. De Acoutiblok tape, lijm en kit producten zijn door onafhankelijke bronnen getest dat ze goed werken in combinatie met Acoustiblok.
Als je klaar bent doe dan nog een uiteindelijke inspectie van het resultaat en zorg ervoor dat je zeker weet dat alles goed afgewerkt is, dus ook de afdichting van de verschillende stopcontacten en andere contactpunten. Nu ben je klaar om de gipsplaten de gaan verwerken. Probeer te vermijden dat de bevestigpunten van gipsplaten komen te liggen op plaatsen waar de Acoustibloklagen overlapt.
Wand installatie tips
Je kan kiezen voor het aansluiten ven de vershillende delen Acoustiblok, of het overlappen van de randen van het materiaal. Hou er wel rekening mee dat door de overlapping een verdikking kan ontstaan die hinderlijk kan zin bij het aanbrengen van de gipsplaten. Ook is het belangrijk of geen montagepunten in het overlapgedeelte aan te brengen. Door het gebruik van Acoustiblok Sound Sealant en een overlap van minimaal 3 centimeter. wordt een juiste geluidsdichte afwerking gewaarborgd. Bij beide methoden moet men hierna de kieren nog afdichten met Acoustitape.
Wanneer je Acoustiblok gebruikt aan de binnenkant van een buitenmuur moet je rekening gehouden worden met de dauwpunt in de constructie. De naden moeten voor een goede afdichting iets overlappen en afgekit worden met Acoustiblok Special Sealant en Acoustitape.
Wanneer de gipsplaten gemonteerd worden zorg ervoor dat de randen geen contact maken met andere oppervlakken. Laat een 3mm tot 10mm rand open en kit deze rand dicht met Acoustiblok Sound Sealant. Dit zorgt ervoor dat de wand ontkoppeld is en dat er geen overdracht van geluid is door middel van contactbruggen. Verder kan de gipsplaat normaal bewerkt worden.
Als er gebruik wordt gemaakt van speakers die in de muur verwerkt zijn, moet je ervoor zorgen dat je genoeg metriaal over hebt om ook achter de speaker het acoustiblok aan kunt brengen. Door het gebruik van Acoustiblkok Sound Sealant en Acoustitape kunnen de naden geluidsdicht afgewerkt worden. .
Door akoestisch materiaal te gebruiken met een hogere densiteit (mate van samenpersing)kan de akoestische isolatie verder gereduceerd worden. We adviseren een product als Thermafiver of Akoestisch foam voor het verwerken in een Acoustiblok wand.
Wood Stud Wall Installation
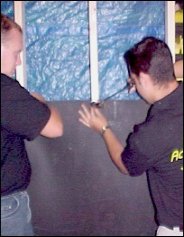
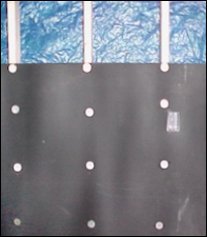
Spijkers nietjes of schroeven kunnen gebruikt worden om Acoustiblok te monteren op houten frame. Om te voorkomen dat het materiaal beschadigd moeten er wel plastic of stalen plaatjes gebruik worden, waardoor het materiaal niet aan de schroef ‘hangt’ maar achter het plaatje geklemd wordt. Wanneer je met een pneumatisch nietpistool werkt zorg er dan voor dat de airpressure laag ingesteld is zodat je niet door het materiaal heen gaat.
Acoustiblok kan het beste horizontaal aangebracht worden op een houten framewerk om het gemakkelijk te monteren en voor de stevigste bevestiging. We adviseren om onderaan de muur te beginnen en zo naar bovente werken. Rechtshandige mensen kunnen het beste van links naar rechts werken.
meet eerst vanaf de hoek tot het eerste obstakel wat je tegen komt. Als dit een te grote afstand is (het gewicht is te zwaar), dan moet het materiaal kleiner snijden om er hanteerbare afmetingen van te maken. Alle naden moeten tussen het Take a measurement from the starting corner to your first obstacle; window door or adjacent wall. If a single piece would be unmanageable; due to the weight (1lb SqFt), cut the material into manageable sizes. All seams must be located in the center of the stud or joist for proper sealing. Snap a chalk line across the studs for visual reference helping to maintain a level run.

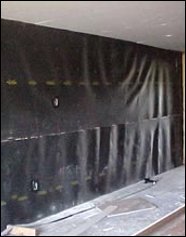
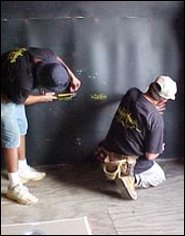
Start the installation in a corner, securing it with 5 fasteners. Install 4-5 fasteners per section starting with the top first and work down, keep fasteners and material flat against the stud. Unroll the material across a few studs and place the roll in one of the following stud cavities, for ease of handling by reducing the weight of the material you are handling during the installation. Use the studs for leverage to help pull the material into position. Do not pull the Acoustiblok too tight; leave a small amount of slack or looseness between the studs. Maintain a small gap (1/8″-3/8″) between all adjoining surfaces (floor, ceiling, walls). These gaps will be sealed later with Acoustigrip™ tape and Acoustiblok Acoustical Sound Sealant.
At the start of the run, use as many fasteners as necessary to secure the first edge and hold the material in place. In most applications, one fastener every 18″ along every stud (4 fasteners per stud for every sheet of Acoustiblok) should be sufficient to secure the Acoustiblok. No matter what fastener is used, it is necessary to use tin caps or staple caps to prevent the Acoustiblok from tearing loose under its own weight. It is also important to keep all fasteners as flush to the surface of the Acoustiblok as possible, to prevent bumps from showing in the drywall installed over the Acoustiblok. Nails and screws must be countersunk into the tin caps.
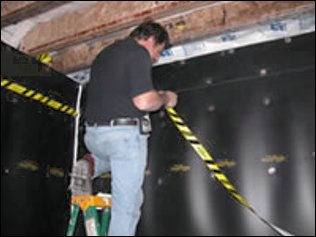
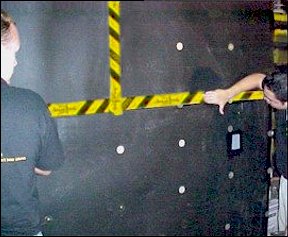
To be effective, an Acoustiblok installation must be as airtight as possible. Use Acoustigrip tape and Acoustiblok Acoustical Sound Sealant to seal all perimeter edges, joints, electrical boxes, access points and the exposed edges at window and door openings. Use Acoustiputty™ pads to seal the backs of any boxes and other large gap wall penetrations.
Steel Stud Wall Installation
Installing Acoustiblok on steel studs is the same process as installation on wood studs, with a few variations. You must of course use self-tapping sheet metal screws, with tin caps, fender washers, or similar to prevent the Acoustiblok material from tearing loose under its own weight. Metal caps and self tapping wafer head screws (Acoustiblok Item # WHS) are available from Acoustiblok Inc.
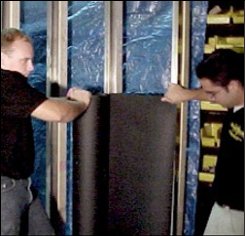
Some installers use 2×4 lumber cut to fit snugly between metal studs, to brace the studs at the end of each run while pulling the Acoustiblok against them. Remove the spacers at the end of every run, before the last row of fasteners go in.
Floor Installation
The Acoustipad™, Acoustiwool™ WF0.125, and Acoustiwool™ TF0.11 are optional underlayments that enhance the sound reduction properties of the Acoustiblok. If your projects installation does not utilize these products omit the related steps from the following instructions.
Wood Joist Installations
Acoustiblok is most effective when it can be applied over the top of the joists before the subfloor is installed. To increase the sound isolation of the floor assembly, a second layer of Acoustiblok may be applied below the truss members (see below under Wood Joist Ceilings).
Use FCA29 Fast Cure Mastic and run an approximate 4′ 6″ bead along each joist. Lay the material over the joists with a minimal number of staples, or tape. It need not be tight, do not worry that it will sag slightly. Do not overlap the Acoustiblok. Wipe clean and seal the seams with Acoustigrip tape and check to ensure there are no gaps or holes left in the installation area. The Acoustiblok barrier should be air tight.
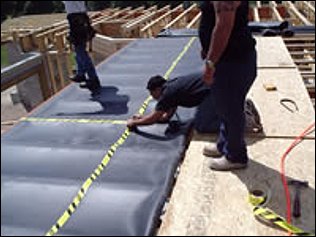
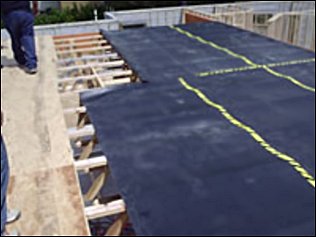
Use FCA29 Fast Cure Mastic to glue the subfloor to Acoustiblok. If you use nails, use the absolute minimum number of nails required to secure the subfloor to the joist as nails will short circuit your noise abatement installation and transmit sound directly from the subfloor into the joists.
If the installation allows, decouple the floor assembly from adjacent drywall 1/8″-3/8″ and fill this gap with Acoustiblok Acoustical Sound Sealant. This eliminates an important path for noise transmission: Direct contact between walls and subfloor causes sound from the floor to travel into the wall structure and down into the other rooms. This is called a “flanking path”.
In between each joist, a 1/8″ clear hole should be drilled in the Acoustiblok as water warning should the floor be flooded at some future date.
NOTE: Eliminating water
If a subfloor assembly with Acoustiblok is exposed to rain or other water sources, the Acoustiblok will hold the water in between the joists. This will not hurt the mold retardant Acoustiblok, but could cause mold or warping to the decking if not thoroughly dried. If it has rained or there is water/moisture held under the decking we suggest the following:
From the bottom, make a cut approximately 4″ long, centered between each joist at the lowest point in the Acoustiblok membrane, and insert any type of spacer in the gap to allow drainage and airflow to thoroughly dry out. After thoroughly dry, and rainwater is no longer a threat, remove the spacers from the cut joints, wipe clean, and put a minimum 8″ piece of Acoustigrip tape over the cut.
Subfloor Installation
For all floor installations where resilient underlayments are used, it is important to maintain isolation of the underlayments and floor finish with all adjacent surfaces. Always leave a 1/8″- 3/8″ perimeter gap between the Acoustiwool, Acoustiblok, substrates and flooring from all adjacent wall surfaces. Fill these gaps with Acoustiblok Acoustical Sound Sealant.
Verify that the underlayments and substrates provide the structural requirements of the finished floor.
Confirm the compatibility of any adhesives, thinset or other products used with the Acoustiblok products. Many adhesives initially bond well to Acoustiblok material, but release within a few days due to interaction of elasticisers with the adhesive medium. Acoustigrip™ tape, Acoustiblok Acoustical Sound Sealant™, Acoustiputty™ pads, and FCA29 Mastic adhesive are formulated to bond permanently with Acoustiblok.
If the installation requires Acoustiblok to be installed on top of the subfloor there are different options depending upon the final finish of the floor.
Carpet Floor Finish
Unroll Acoustipad perpendicular to the planned direction of the Acoustiblok Sound Isolation Material. Tape all seams using Acoustigrip tape. If needed run a bead of adhesive along the edges to prevent the Acoustipad from curling up.
Install the Acoustiblok and tape all seams using Acoustigrip tape in one of the following configurations:
- Install the tack strip using fasteners long enough to compensate for the additional 1/2″ height of the Acoustiblok and Acoustipad underlayments.
- Install the Acoustipad approximately 1-1/2″ – 2″ away from the perimeter edge allowing the Acoustiblok to drape over its side, then install the tack strip on top of the Acoustiblok only.
- Install 1″ x 2″ furring strips 1/8″ – 3/8″ away from perimeter surfaces and nail the tack strip on top of it. Use Acoustiblok Acoustical Sound Sealant to fill in the perimeter gap. The height of all your materials Acoustipad, Acoustiblok, and the carpet padding should be close to even with the top edge of the furring strip.
Install carpet & padding per manufacturers instructions.
Wood Floor Finish
Place the Acoustiwool WF0.125 perpendicular to the planned direction of the Acoustiblok Sound Isolation Material. Allow the Acoustiwool WF0.125 to float on the subfloor – do not use any adhesive. Do not overlap the material. Tape all seams.
Next roll the Acoustiblok over the Acoustiwool-WF0.125 taping the seams and caulking around the perimeter. You may spot glue the Acoustiblok onto the Acoustiwool-WF0.125. If the Acoustiblok is not lying flat, allow it to sit overnight at ambient room temperature.
For glued down, engineered or solid, wood follow the manufacturer´s installation instructions. Verify compatibility of recommended adhesive with the Acoustiblok material. You may also further decouple the floor assembly by adding free floating plywood or other suitable substrate on top of the Acoustiblok as the subfloor. Do not use any adhesives in this step; allow the substrate to float freely on top of the Acoustiblok and Acoustiwool-WF0.125 combination.
For mechanically fastened engineered or solid wood flooring you may install it directly on top of the Acoustiblok following manufacturers’ instructions. The recommended installation is to have a floating plywood substrate as above. This decouples the floor assembly from the building frame, and prevents fasteners from mechanically transmitting noise between the joist/subfloor assembly and the floating floor assembly (acoustical short circuit).
In all installations, leave a 1/8″-3/8″ perimeter gap between the Acoustiwool-WF0.125, Acoustiblok, substrate and flooring from all adjacent wall surfaces. Fill perimeter gap with Acoustiblok Acoustical Sound Sealant.
Tile Floor Finish
Subfloor construction must comply with ANSI, TCNA and other industry standards.
Place the Acoustiwool-TF0.11 perpendicular to the planned direction of the Acoustiblok Sound Isolation Material. Use thin set to adhere the Acoustiwool-TF0.11. Roll flat with a 75lb roller. Do not overlap the material. Tape all seams using Acoustigrip tape.
For better acoustical isolation you may choose to install the Acoustiwool-TF0.11 and the Acoustiblok without adhesives and install free floating plywood or other suitable surface underlayment on top of the Acoustiblok as the floor substrate. If natural stone tiles are to be installed, a suitable substrate must be installed on top of the Acoustiblok and Acoustiwool- TF0.11. If only the Acoustiblok is installed you may install the tiling directly adding Laticrete 333 Thinset Admix or other acrylic bonding agent to your thinset.
As always, leave a 1/8″-3/8″ perimeter gap between the Acoustiwool-TF0.11, Acoustiblok, and tile flooring from all adjacent surfaces. Fill this gap with Acoustiblok Acoustical Sound Sealant.
Ceiling Installation Overview
Due to the weight of the Acoustiblok Sound Isolation Material, it is recommended that a 2 – 3 person crew be used for safety and installation efficiency.
If your project uses recessed can lighting it is important that you specify sealed back can lights for the project. Sealed back fixtures provide a significantly better sound reduction than standard fixtures. Do not use Acoustiblok to surround or enclose any light fixtures due to possible high temperatures, and air flow requirements.
Any penetrations for ductwork, lighting, etc must be sealed around the edges with Acoustiblok Acoustical Sound Sealant and Acoustigrip tape.
Using a higher density insulation may further enhance the sound reduction properties of an Acoustiblok treated ceiling assembly. We recommend using a mineral wool product such as Thermafiber or IIG (Industrial Insulation Group) to increase the sound reduction of the assembly.
Wood Joist Ceilings
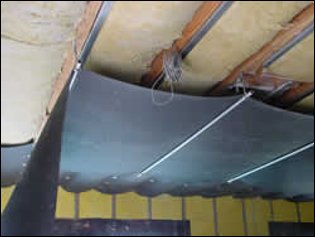
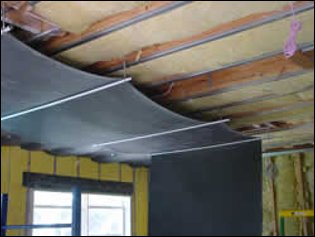
When installing Acoustiblok overhead, it is necessary to support the material in place for fastening. Acoustiblok recommends on-site fabrication of a simple roller support system. Empty Acoustiblok roll cores, PVC pipe, or conduit may be used. Pass a sufficiently strong rope or wire through each roller, and make a loop at either end to hang the roller assembly between nails driven into the joists. Pull the Acoustiblok material through your roller supports, and work backward along the material applying fasteners. Move the rollers back as required to support the free end of the Acoustiblok material. View the video below for a demonstration of this technique and others.
Allow enough slack in the Acoustiblok so it hangs below the joist 12″ or a distance that will allow you to comfortably lift and hold the material to the joist to fasten it. Space fasteners every 8″-10″. Seal all seams with Acoustigrip tape.
Alternately, a T-bar, drywall jack, or other suitable method may be used to support Acoustiblok material during overhead installation.
Once Acoustiblok is in place, install ceiling as designed. A hanging track & channel framing ceiling system is recommended as it provides the greatest mechanical isolation from the floor assembly. You may also install hat channel perpendicular to the joists over the Acoustiblok for additional ceiling isolation.
If using resilient channel, attach the channels to the stud or joist 24″ o.c. on top of the Acoustiblok. Use screws long enough to penetrate the drywall and channel only. Do not penetrate the Acoustiblok Sound Isolation Material.
Maintain a 1/8″-3/8″ gap around the perimeter to isolate the ceiling from the adjacent walls. This prevents an acoustical flanking path from transmitting sound around your Acoustiblok installation. Fill this gap with Acoustiblok Acoustical Sound Sealant.
Concrete Ceilings
Acoustiblok must have a framing member for attachment, requiring at minimum a furring channel for attachment. Finish installation and details as outlined above in wood joist installations.
